A surfer in Jacksonville leaned his boards against the garage wall for two years — until a board fell, cracked the tail, and dominoed into his car door. That single incident cost more in repairs than a proper surfboard garage rack would have cost upfront. Building a surfboard-friendly garage storage area isn’t about luxury or aesthetics — it’s about protecting expensive boards from dings, falls, sun damage, and the heat that delaminates fiberglass faster than anything else. A proper garage storage organization system keeps boards secure, accessible, and protected while reclaiming floor space that leaned boards steal. Most garages can accommodate 2–6 boards with the right rack system without sacrificing parking space or workshop area.
Florida garages present unique challenges for surfboard storage: extreme heat (150°F+ in summer sun), humidity that breeds mildew on wax and wetsuit materials, and limited space in homes where garages often serve as workshops, gyms, and general storage. Standard garage storage advice doesn’t account for surfboards’ specific needs — length, fragility, heat sensitivity, and the fact that they need to be grabbed quickly when the waves are pumping. This guide covers exactly how to build a surfboard garage rack setup that protects your boards, saves space, and gets you to the beach faster.
Why Does Proper Garage Storage Matter for Surfboards?
Proper garage storage prevents the four main killers of surfboards: heat damage (delamination), UV exposure, physical dings from falls and leaning, and pressure dents from improper resting positions that warp foam cores over time.
What damages surfboards in garages:
- Heat (biggest threat): Florida garages reach 130–150°F in summer. Heat above 100°F causes delamination — the fiberglass separates from the foam core, creating bubbles that weaken the board permanently.
- UV exposure: Direct sunlight through garage windows yellows and weakens fiberglass. UV degradation is cumulative and irreversible.
- Falls and dings: Boards leaned against walls fall. Every fall risks dings that let water enter the foam core, causing internal rot.
- Pressure dents: Boards resting on their rail (edge) in the same spot develop permanent pressure dents in the foam. Proper rack support distributes weight.
- Humidity/mildew: Wax and wetsuit materials breed mildew in humid garages. Ventilation and separation prevent cross-contamination.
What Are the Best Surfboard Rack Options for a Garage?
The best garage surfboard rack options are wall-mounted horizontal racks, ceiling-mounted hoists, freestanding vertical racks, and DIY custom solutions — each offering different space efficiency and access patterns for different garage layouts.
Rack type comparison:
| Rack Type | Space Efficiency | Board Capacity | Access Ease | Price Range | Best For |
|---|---|---|---|---|---|
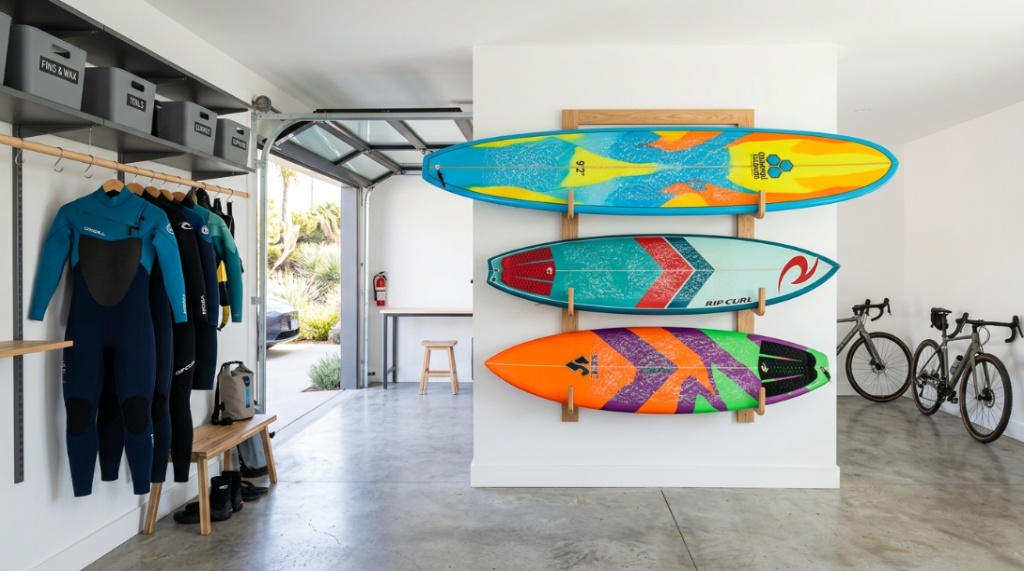
| Wall-mounted horizontal | Excellent | 1–6 boards | Good | $30–$100 | Most garages, easy access |
| Ceiling-mounted hoist | Best (uses dead space) | 1–4 boards | Moderate (requires lifting) | $40–$120 | Small garages, infrequent access |
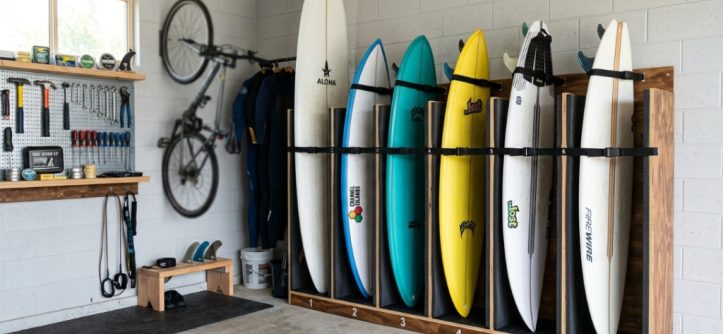
| Freestanding vertical | Good | 2–8 boards | Excellent | $50–$200 | Renters, moveable solution |
| DIY wall rack | Custom to space | Custom | Depends on design | $20–$60 materials | Custom spaces, budget builds |
How Do You Install a Wall-Mounted Surfboard Rack?
Install a wall-mounted rack by locating studs (essential for weight support), mounting at a height accessible without a ladder, padding all contact points to prevent dings, and ensuring adequate spacing between boards to prevent contact.
Wall-mount installation steps:
- Step 1 — Find studs: Use a stud finder. Surfboard racks MUST mount into studs, not just drywall — boards are heavy and drywall anchors will fail.
- Step 2 — Determine height: Mount so the lowest board is accessible without a step stool. Upper boards can require a reach but should be manageable.
- Step 3 — Space racks vertically: Leave 10–14 inches between rack tiers for board thickness plus clearance. Boards shouldn’t touch each other.
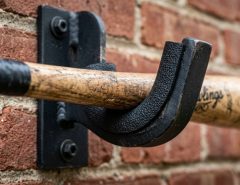
- Step 4 — Pad contact points: All surfaces touching the board need foam padding, pipe insulation, or similar soft material. Metal or wood directly on fiberglass causes dings.
- Step 5 — Secure mounting: Use appropriate lag screws or heavy-duty screws into studs. Each rack arm should support at least 30 lbs safely.
- Step 6 — Test before loading: Pull firmly on the installed rack before placing expensive boards. Better to discover a weak mount with a tug than with a fallen board.
How Do You Protect Boards From Garage Heat in Florida?
Protect boards from Florida garage heat by insulating the garage (or the board storage area), keeping boards away from exterior walls that absorb sun heat, using reflective barriers, and storing boards in board bags during the hottest months.
Heat protection strategies:
- Insulate the garage: Insulated garage doors and wall insulation reduce peak temperatures 20–30°F. The best long-term solution for all stored equipment.
- Interior wall mounting: Store boards on interior walls (shared with the house), which stay cooler than exterior walls that absorb direct sun.
- Board bags: Reflective board bags or day bags provide a temperature buffer. A silver reflective bag reduces board surface temperature significantly.
- Ventilation: Even a small exhaust fan pulling hot air out reduces peak garage temperatures and prevents heat buildup.
- Avoid direct sun patches: If your garage has windows, position racks where sunbeams never hit. Even brief daily sun exposure causes cumulative UV and heat damage.
- Ceiling storage caution: Hot air rises — ceiling racks sit in the hottest zone. In uninsulated garages, ceiling storage is actually the worst spot for heat-sensitive boards.
Critical Florida note: if your garage is uninsulated and faces south or west, interior temperatures can exceed 140°F in summer. At these temperatures, boards WILL delaminate. Either insulate, use board bags, or consider indoor storage during summer months.
How Much Space Does a Surfboard Storage Area Need?
A functional surfboard storage area needs approximately 8–10 feet of wall length per 2–3 boards (horizontal), 3–4 feet of floor space (freestanding), or minimal floor space using ceiling hoists. Plan based on your board sizes and quiver count.
Space requirements:
- Longboards (9’+): Need at least 10 feet of wall length for horizontal storage. Ceiling hoists work well for longboards — gets them completely out of the way.
- Shortboards (5’6″–6’6″): Need 7–8 feet of wall length. More compact, easier to stack multiple boards vertically on wall racks.
- Multiple boards: Stack vertically on the wall with 10–14 inches between tiers. A 8-foot-high wall can hold 4–5 boards in under 3 feet of horizontal wall space.
- Freestanding racks: Floor footprint of 2–4 feet wide by 1–2 feet deep for 2–6 boards. Can be positioned anywhere with floor space.
Space-saving tip: vertical stacking on a wall (boards flat, stacked upward) uses the least floor space and horizontal wall space while holding the most boards. This is the most space-efficient approach for garage storage with multiple boards.
What Accessories Complete a Surfboard Garage Storage Area?
Complete the storage area with wetsuit hangers, wax storage (away from heat), leash hooks, fin organization, and a board repair station — creating a comprehensive surf zone that keeps all gear organized and accessible.
Complementary storage accessories:
- Wetsuit hanger/rack: Wide-shoulder hangers or a dedicated wetsuit drying rack. Never fold wetsuits — it creases the neoprene.
- Boot/glove dryer: For cold-water surfers. A simple boot dryer prevents mildew in neoprene accessories.
- Wax storage: Keep wax in a cool container (not the hot garage — it melts). A small cooler or insulated box works.
- Fin organizer: Small bins or mounted organizer for loose fins, fin keys, and screws. Prevents losing small parts.
- Leash hooks: Simple hooks for hanging leashes — prevents tangles and keeps them off the floor.
- Changing mat: A mat by the garage entrance for wetsuit removal keeps sand and water contained.
- Repair supplies: Ding repair kit, sandpaper, resin. Having repair supplies accessible means fixing dings immediately before water damage.
How Do You Build a DIY Surfboard Garage Rack on a Budget?
Build a DIY wall rack for under $40 using two wooden dowels or PVC pipes per board, mounted into wall studs with L-brackets, padded with pipe insulation foam — simple, effective, and customizable to any garage layout.
DIY rack materials and method:
- Materials ($20–$40): Wooden dowels or PVC pipe (1–1.5 inch diameter), L-brackets or shelf brackets, pipe insulation foam, mounting screws (lag screws for studs).
- Method: Mount two padded horizontal arms per board, spaced to support the board at roughly 1/3 and 2/3 of its length. Arms extend 8–12 inches from the wall.
- Padding (essential): Wrap all contact surfaces with pipe insulation foam or pool noodle pieces. Secure with tape or zip ties. Prevents dings.
- Stud mounting (essential): Every bracket must anchor into a wall stud. Boards are heavy — drywall anchors will pull out and drop your boards.
- Spacing: 10–14 inches between tiers for board thickness plus clearance.
A DIY rack costs $20–$40 in materials, takes 1–2 hours to build and install, and holds 2–4 boards securely when mounted into studs. It’s the most cost-effective solution for basic garage storage and can be customized to any wall layout.
Conclusion
Building a surfboard-friendly garage storage area protects your investment from the four main damage threats — heat, UV, falls, and pressure — while reclaiming floor space and keeping boards accessible for quick surf sessions. The right approach combines a secure rack system (wall-mounted for most garages), heat protection (insulation, interior walls, board bags), padded contact points, and complementary storage for all your surf gear.
For Florida garages specifically, heat protection is critical — uninsulated garages can reach temperatures that delaminate boards in hours of peak summer. Insulate if possible, use interior walls, and consider board bags for summer protection. Beyond that, proper mounting into wall studs, padded contact surfaces, and organized accessory storage create a complete surf zone that protects gear and speeds up your transition from garage to waves. Budget $30–$200 for rack systems or $20–$40 for effective DIY solutions that work just as well.
How many boards do you have and what’s your garage layout like? Share in the comments — I’ll recommend the specific rack type and layout that maximizes your space.
When planning your layout, keep in mind that a one-size-fits-all rack rarely works if your quiver grows over time. Longboards require extra ceiling clearance, while shortboards can comfortably squeeze into tight vertical corners. If you are just starting out, your rack needs to accommodate thicker, high-volume shapes. Understanding the Different Types of Surfboards for Beginners will help you accurately measure your wall slots and choose the right padding thickness to protect those wider foam and epoxy rails from accidental garage dings.
Frequently Asked Questions
What’s the best way to store surfboards in a garage?
Wall-mounted horizontal racks are best for most garages — they save floor space, keep boards secure, provide easy access, and are affordable ($30–$100). Mount into wall studs, pad all contact points, and position on interior walls away from heat and direct sun. Space boards 10–14 inches apart vertically.
Will a hot garage damage my surfboard?
Yes — Florida garages can reach 130–150°F in summer, which causes delamination (fiberglass separating from foam). Protect boards by insulating the garage, mounting on cooler interior walls, using reflective board bags, and avoiding ceiling storage in uninsulated spaces where hot air accumulates.
How do I prevent dings when storing surfboards?
Pad all rack contact points with pipe insulation foam or pool noodle material. Space boards so they don’t touch each other. Never lean boards against walls unsecured. Use a secure rack system that prevents falls. Wrap boards in board socks for extra protection during storage.
Can I build a surfboard rack myself?
Yes — a DIY wall rack costs $20–$40 in materials (wooden dowels, L-brackets, pipe insulation, screws) and takes 1–2 hours. Mount padded horizontal arms into wall studs at two support points per board. It’s effective, customizable, and the most budget-friendly solution for garage surfboard storage.
How much space do I need for surfboard storage?
Wall-mounted: 8–10 feet of wall length for 2–3 longboards or 6–7 feet for shortboards. Vertically stacked on a wall, 4–5 boards fit in 3 feet of horizontal space. Freestanding racks use 2–4 feet of floor width. Plan based on your longest board and total board count.
Should I store surfboards on the ceiling or wall?
Wall-mounted is better for most situations — easier access, stays cooler (hot air rises to ceiling), and simpler installation. Ceiling hoists work for boards you access infrequently (backup boards, seasonal storage) or in very small garages where wall space is limited. In uninsulated garages, avoid ceiling storage due to extreme heat at the ceiling level.


Leave a Reply